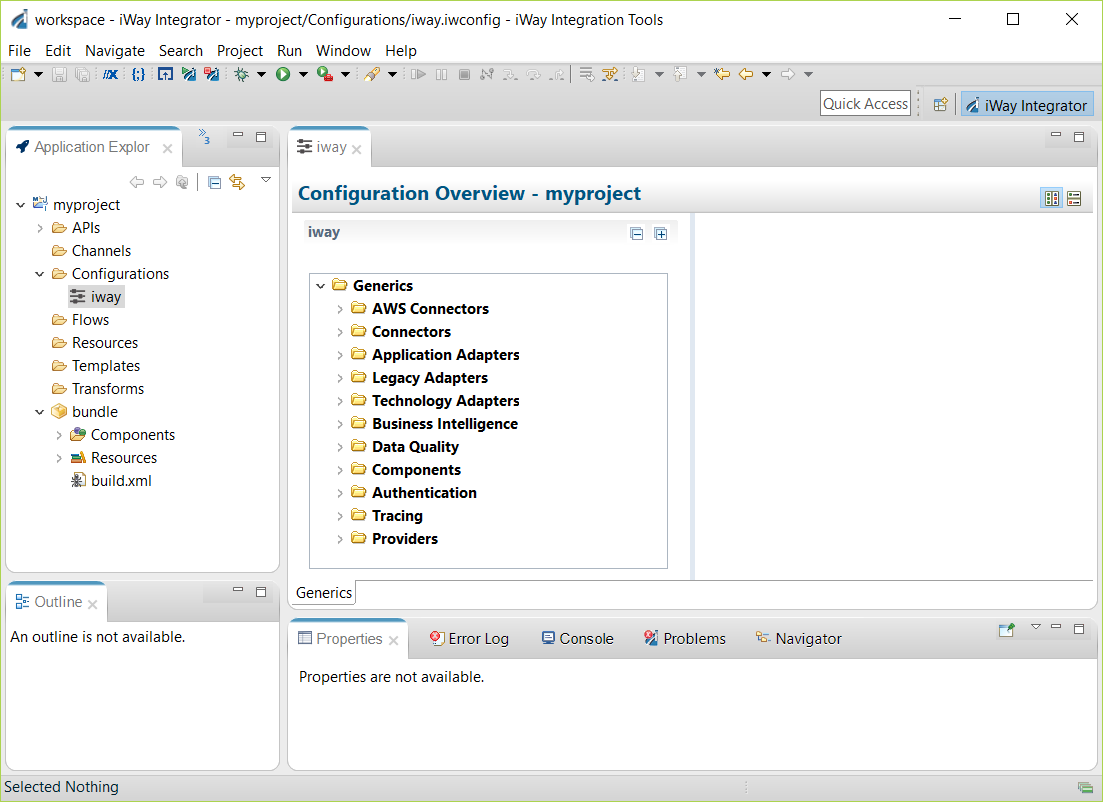
iWay API Builder Overview
The iWay API Builder is a powerful user interface for developing REST based API's using a RAML or OpenAPI based API definition. The API builder can provide scaffolding to easily describe any endpoint defined within an API definition. This makes implementing API's quite an easy task. Lets test drive the API builder to see how just how easy it is to use.
The Test Drive
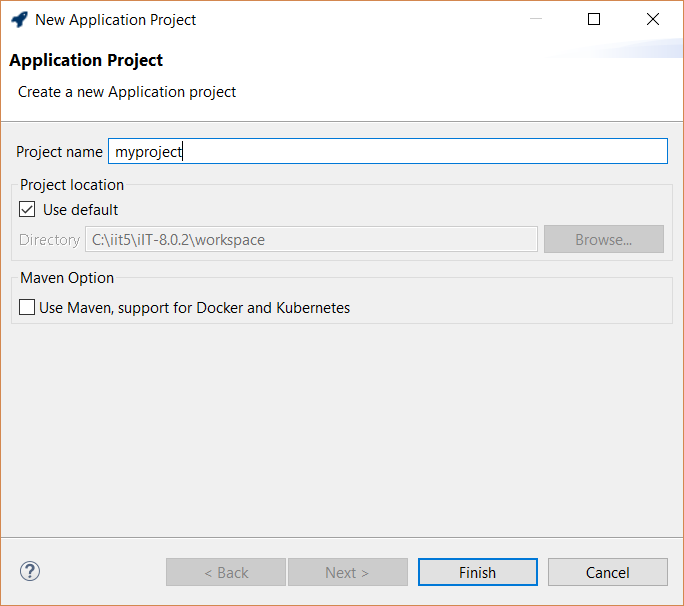
To get started we are going to need an Application Project. To learn more about Application Projects click here. We are going to assume we have an Application Project named "myproject" available. Select the API folder and right mouse click to launch the API builders creation dialog.
Creating a REST API
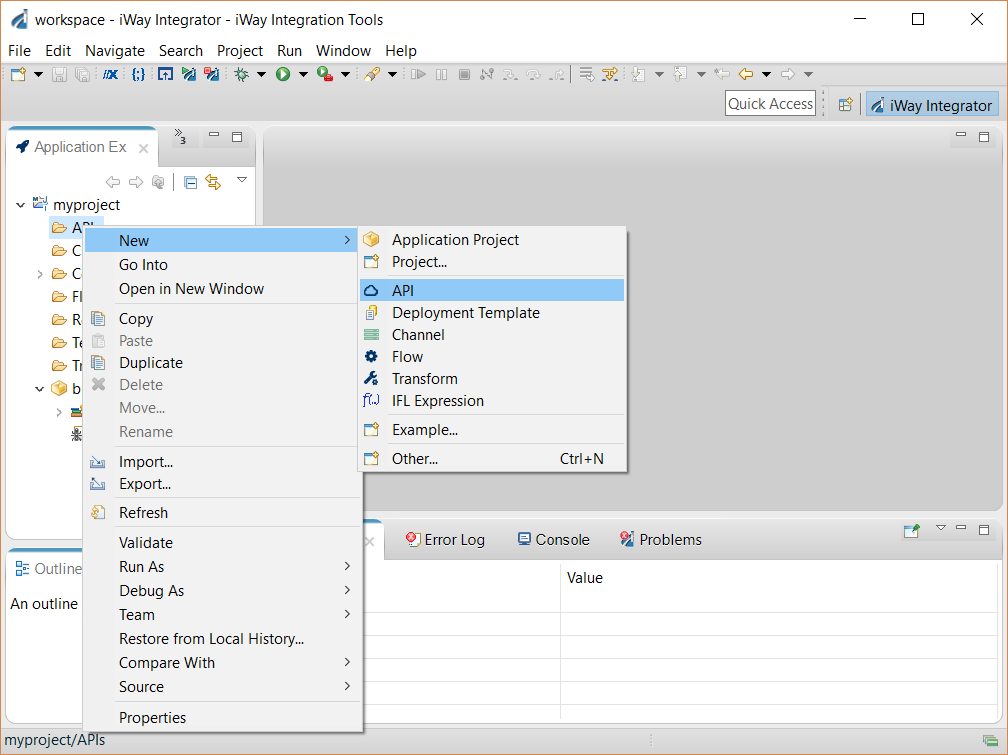
Clicking on the New API menu item launches the dialog as shown below. We will name our api ,"myAPI" and load an API definition file. By clicking on the button to the right as shown below we are given a choice to either load from a workspace, file system or from a URI.
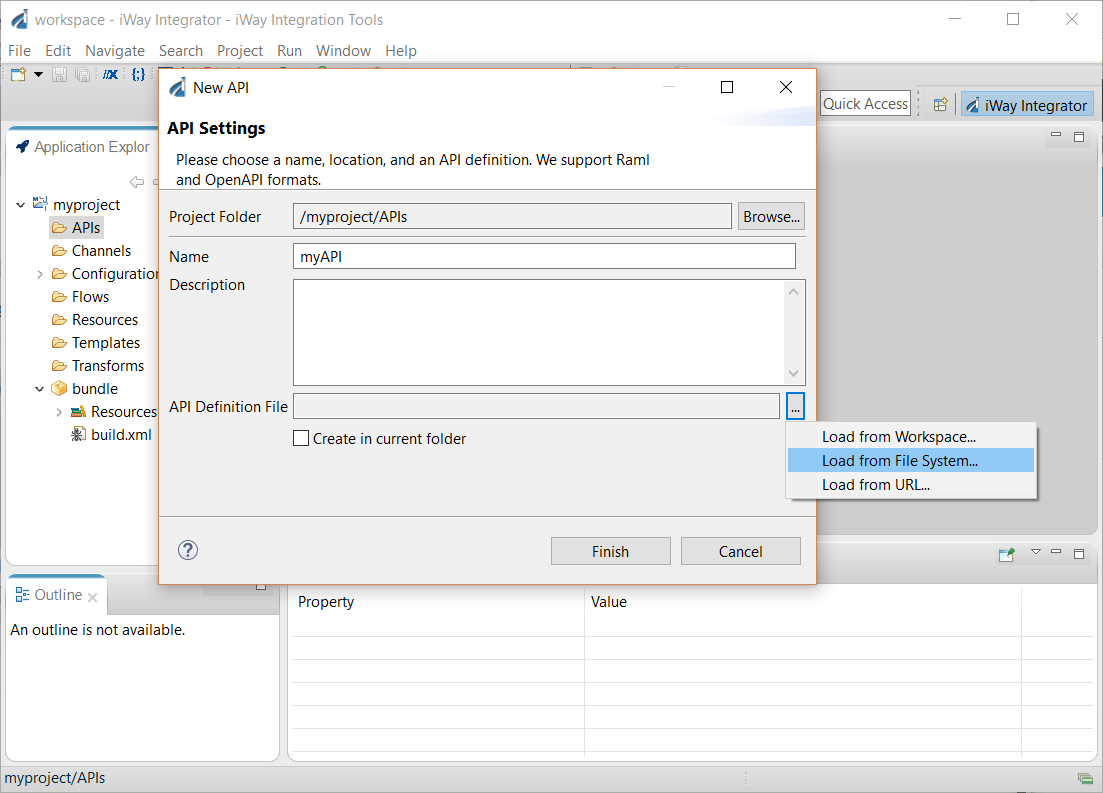
We will keeps things simple and load a definition from the file system.
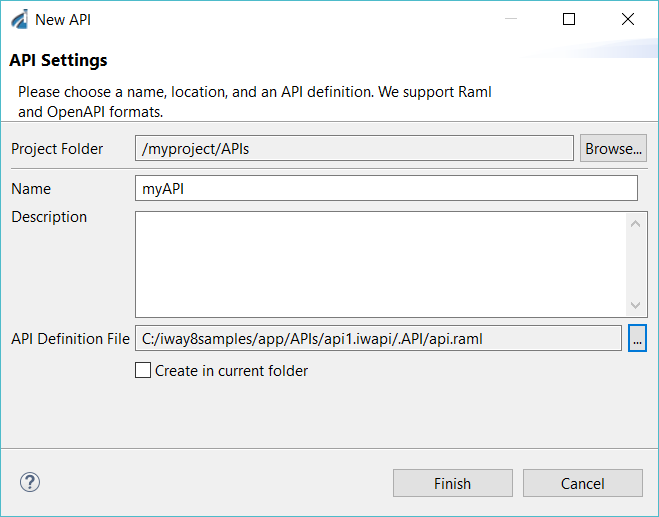
Click "Finish" which will begin the process of creating the API scaffolding.
API Scaffolding
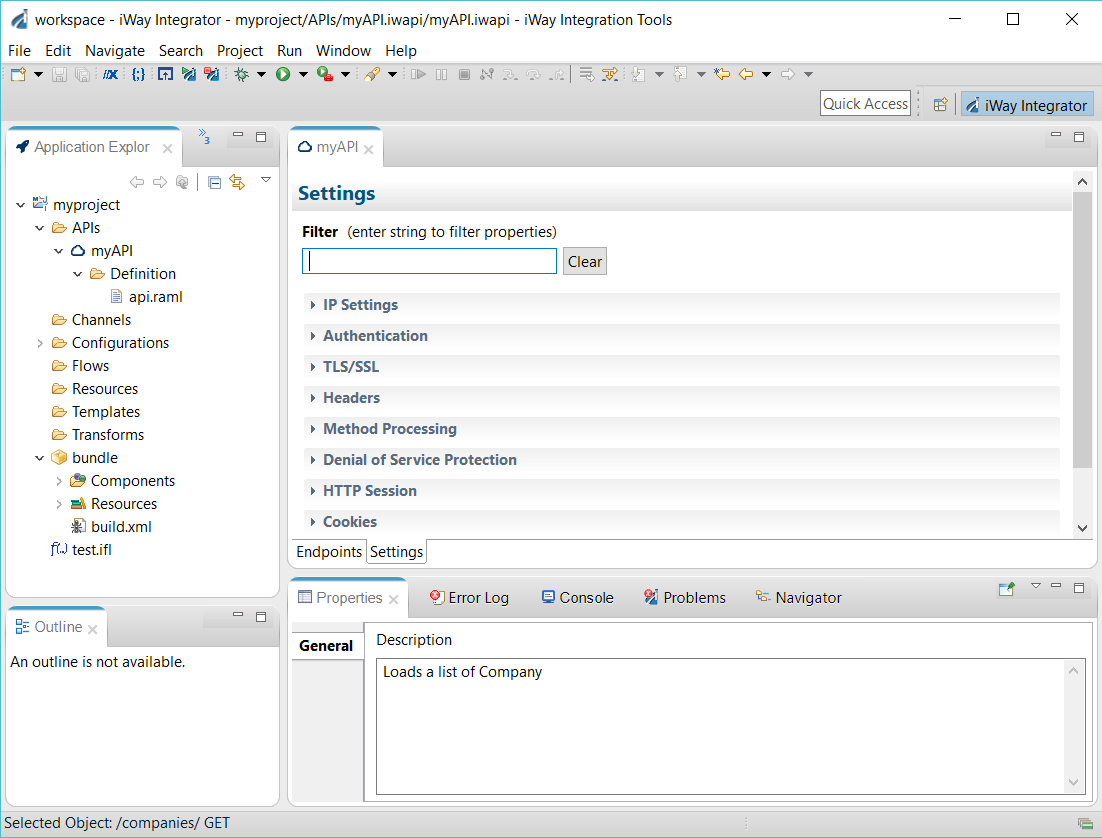
Once completed, IIT should look similar as shown below. Notice a new entry has been added to the API's folder with the name of the API we specified earlier. Also notice that the API definition file, "api.raml" has been imported to the application project. We can now see the API endpoints as defined in "api.raml".
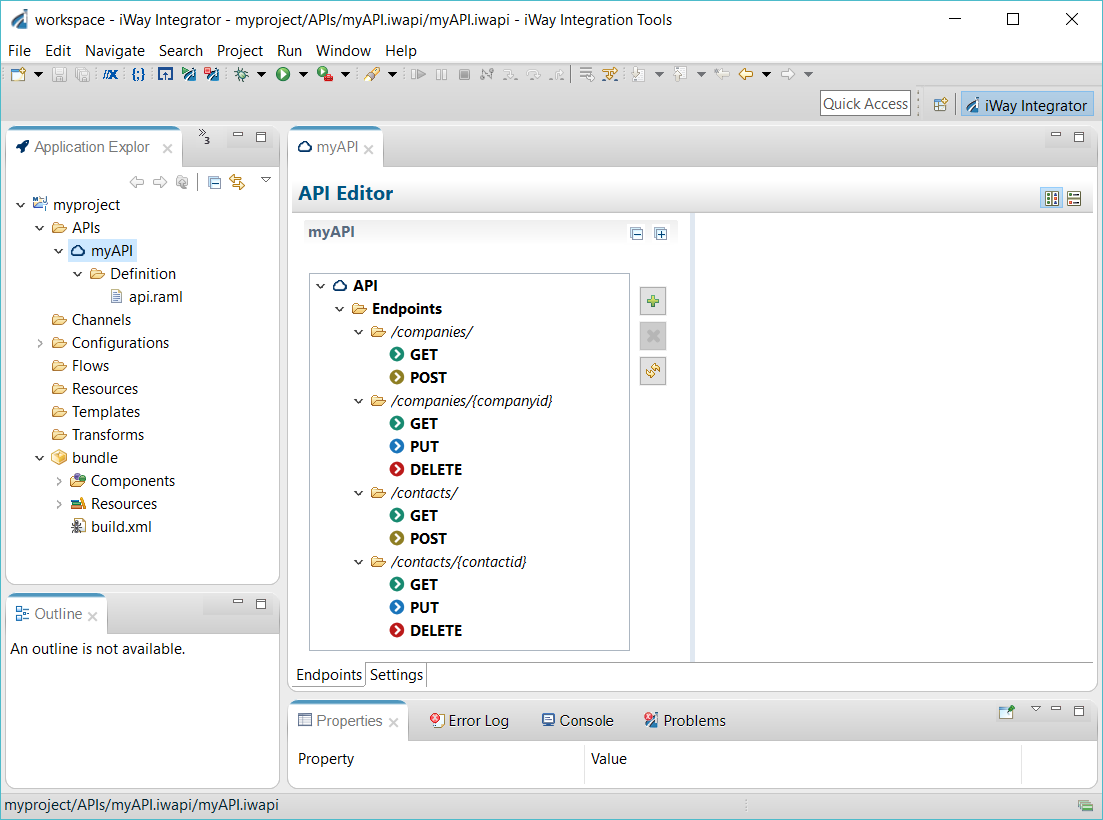
At this point we are going to look at an endpoint. Click on the "/companies" GET endpoint as shown below:
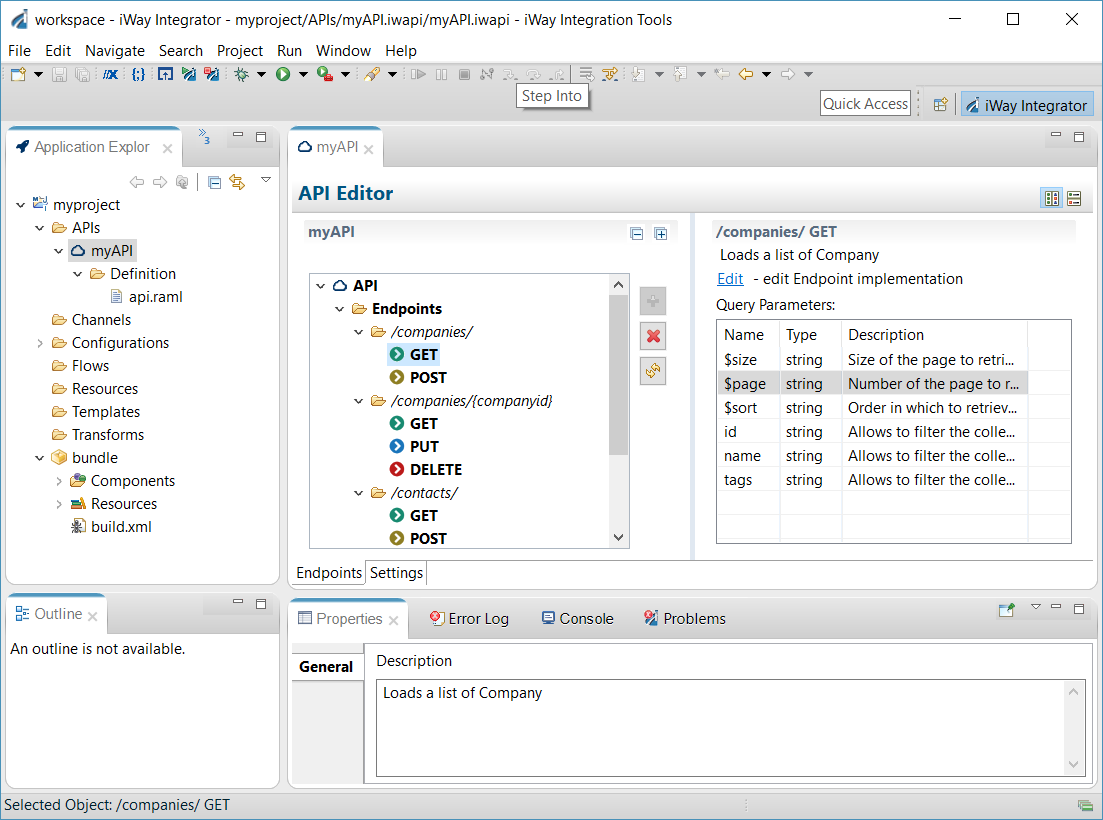
We can see that the API defines several query parameters for the GET method on the "/companies/ "endpoint. These parameters make up the query string which can be used when making a call using HTTP.
An API Endpoint
To look at the endpoints implementation we click on the "Edit" link as shown above. Clicking on this link yields:
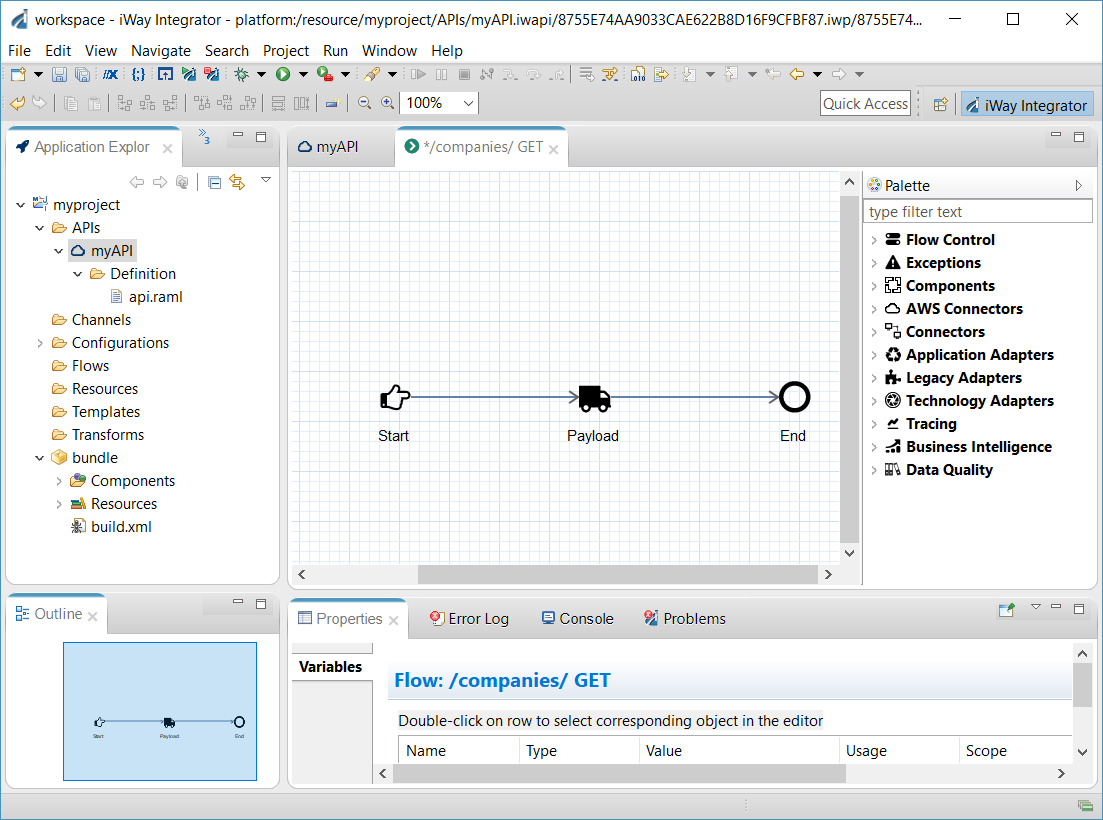
As we can see above.. the endpoints implementation drops us into the iWay Flow Editor where we can orchestrate business logic accordingly.
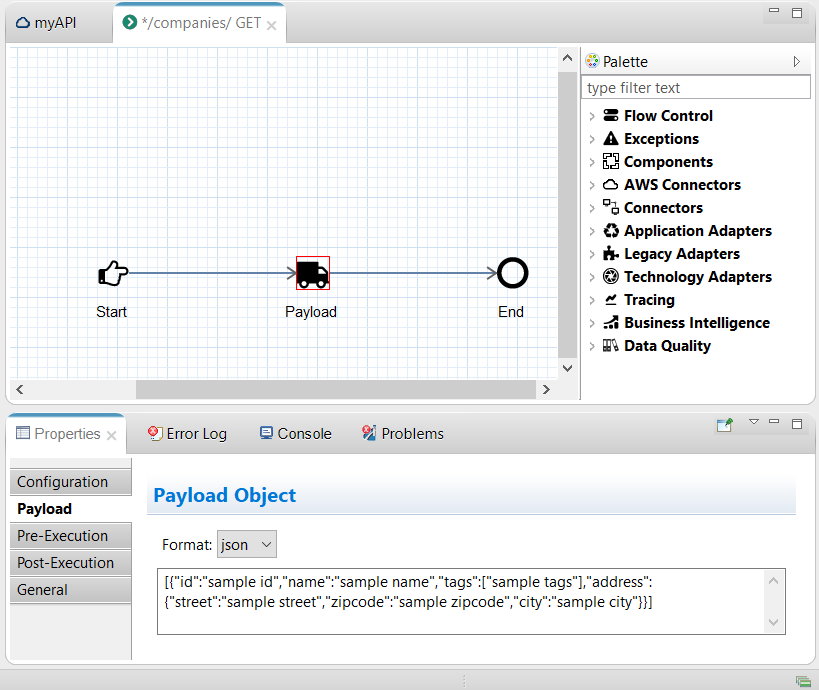
We can also observe that there is a Payload object defined in the endpoint implementation. This was added within the scaffolding process, when it was detected that there was an example defined in the API definition file for an HTTP response of 200 which is considered to be the default response.
URL & Query Parameters
Both URL and Query parameters can be retrieved using the iWay Functional Language, often referred to as IFL. Specifically we will be using the _sreg() function which takes in the name of a variable and returns its value during runtime execution. IFL expressions can be used to satisfy almost any value found within a deployment template, flow and/or channel definition.
In the "/companies/" endpoint there are six query parameters defined. Their values can be retrieved by using the following IFL expression:
_sreg(queryparm.[parameter name])
In the "/companies/{companyid}" end point the value of the companyid can be retrieved using the following IFL expression:
_sreg(url_parameter.companyid)
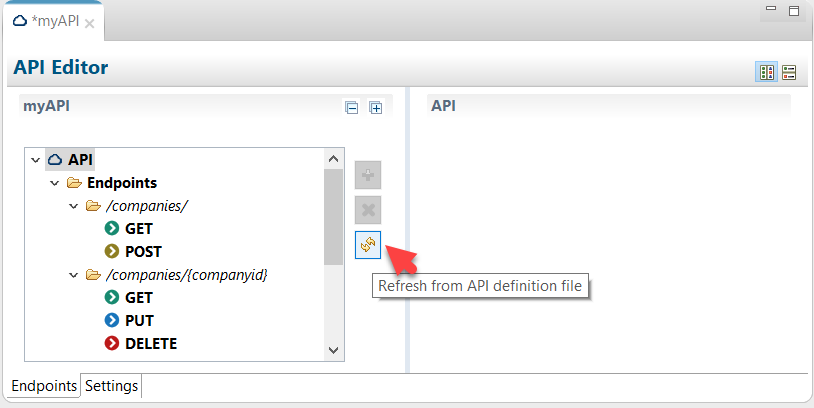
Refreshing the API
Often your API may change shape and or form. The Refresh button will re-parse the API definition document located under Definition folder of your API file and update the API file as needed. It will add all the endpoints, and methods, as well as query parameters and headers that have been added to the definition since the API was first loaded or last refreshed.
Testing the Endpoint
A REST endpoint can easily tested by issuing a "Test Run" as shown below:
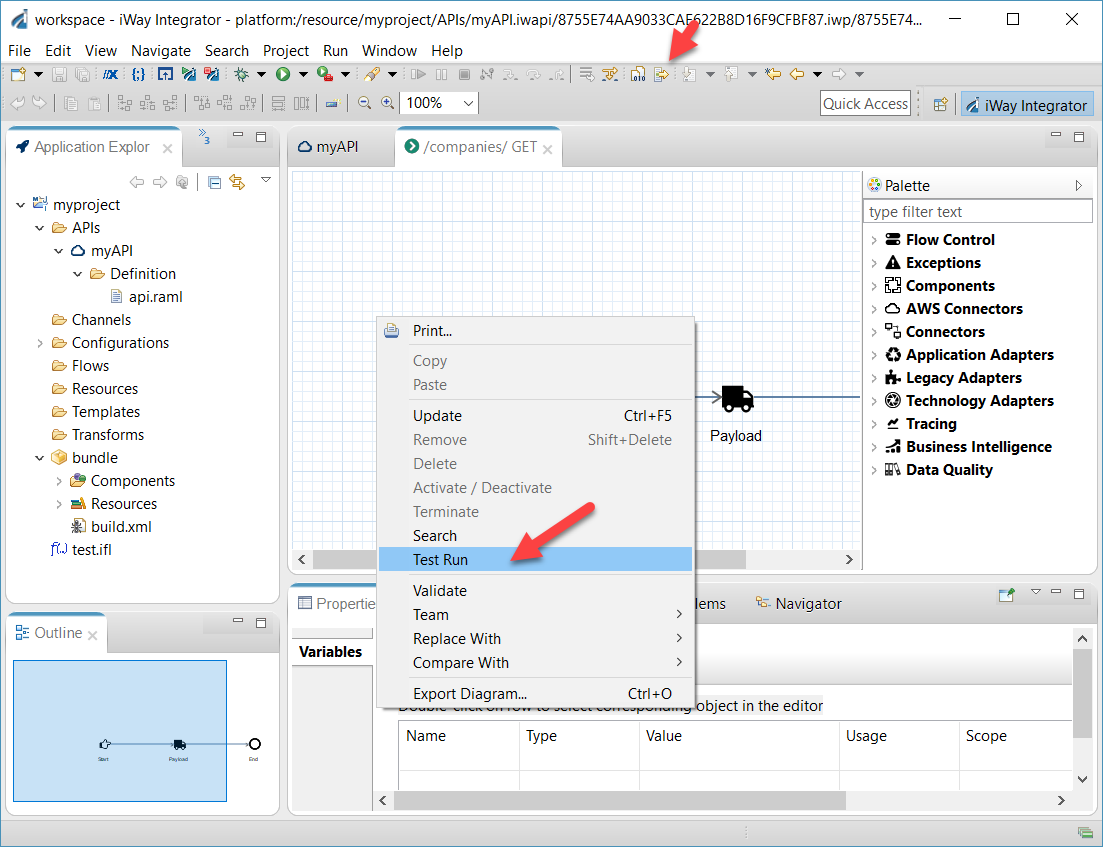
This will launch an Eclipse run configuration specifically designed to test iWay API's. For more information about testing flows see iWay Flow Testing section of this documentation. For API's however this user interface has been enhanced to include both query and url parameters as shown below:
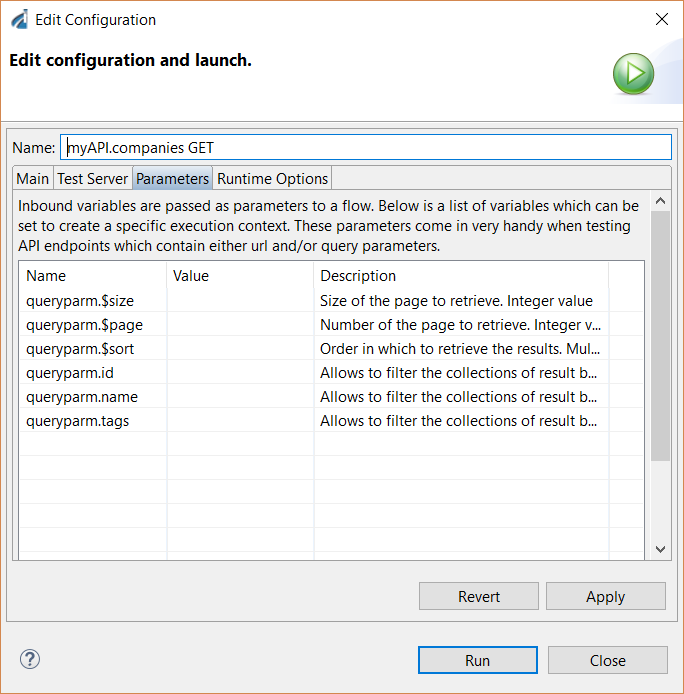
Users can set these parameters and have them available at run-time. Once again refer to iWay Flow Testing for further techniques on debugging flows.
Advanced Configuration
The REST API is implemented using a non blocking HTTP listener. That listener has several configuration options such as the listening port, pooling options, denial of service, security, authentication and a whole lot more. Click on the Settings tab as shown below of the API to explore the rich set of options.
Deploying the API
There are several options available for deploying an API. API's have no special needs as far as it comes to deploying an iWay Application. Please refer to Deploying Application Projects for guidance on deploying an application.
Testing a Deployed API
Once deployed an API can be tested using any tool which can issue a HTTP request. Programs such as Fiddler or Postman are great tools for testing API's. In iWay 8.x, iWay's Explorer was enhanced to explore iWay runtimes with API components. See iWay Explorer for further details.