Moving a File (Event-Based)
Search form
This topic describes how to move a file from a source location to a destination location. A channel is used, which listens for any new files matching the defined filter criteria to appear in the input folder, reads the files and executes the associated process logic, and then outputs the result into the destination location. Using a channel is just one way of handling file operations. You can also use a process flow for this purpose, which can be executed on demand through an API or as part of a channel.
Included With This How-To:
The following sample component is included with this how-to:
- file_management.zip – A completed application project that you can import into iWay Integration Tools (iIT) using the Import Existing Project into Workspace option. After importing, you can browse the components and proceed to deploying the application.
________________________________________________________
Click here to download a PDF version of this How-to.
________________________________________________________
This how-to includes the following topics:
- Prerequisites
- Summary of Steps and Key Features
- Creating an Application Project
- Configuring a Process Flow
- Configuring a Channel
- Deploying the Application
- Starting and Testing the Application
Prerequisites
Before continuing, ensure that the following prerequisites are confirmed.
- Folders. The following input and output folders are predefined for the File listener:
-
C:\temp\in
-
C:\temp\out
Ensure that these folders are created before proceeding with this how-to. However, you may also define other paths for the input and output folders when configuring the File listener.
-
- File. Any XML file.
Summary of Steps and Key Features
This how-to consists of the following steps:
- Creating an application project.
- Creating a process flow.
Note: The process flow in this how-to does not perform a complex operation. However, in a real application, the process flow would be used to manipulate and enrich data as required.
- Creating a channel to:
- Read XML files (based on the selected filters).
- Call the process flow.
The following key features are demonstrated by this how-to:
- Channel Builder
- File listener
- Application deployment
Creating an Application Project

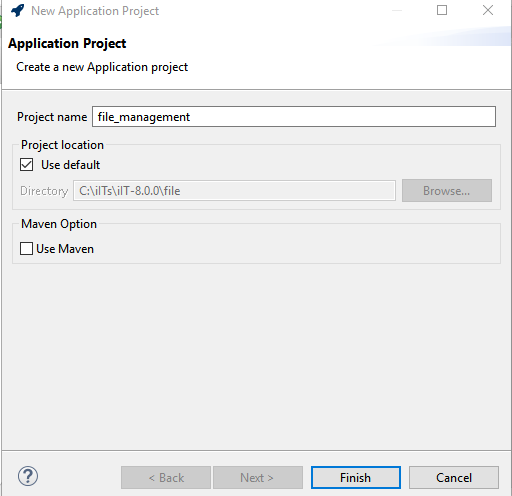
The New Application Project dialog box opens, as shown in the following image.
- Open iWay Integration Tools (iIT) and select the default workspace.
- Right-click anywhere within the Application Explorer tab, select New from the context menu, and then click Application Project, as shown in the following image.
- Provide a project name (for example, file_management) and then click Finish.
A new application is created, containing the required project folder structure, as shown in the following image.
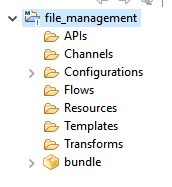
The bundle folder is the application package name, which you can rename if required. During deployment, you will be prompted to select the name of the deployed application.
You are now ready to configure your process flow.
Configuring a Process Flow
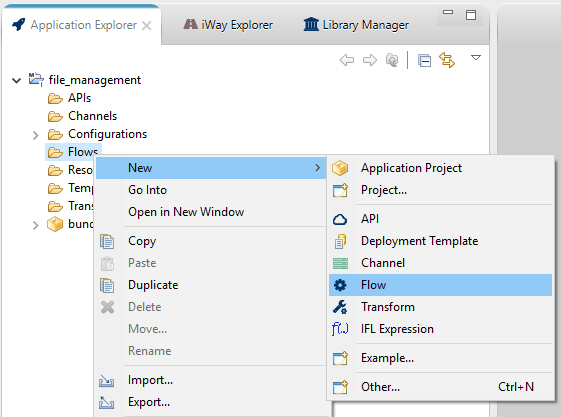
- Right-click the Flows folder, select New and then click Flow, as shown in the following image.
-
The New Flow Wizard dialog box opens, as shown in the following image.
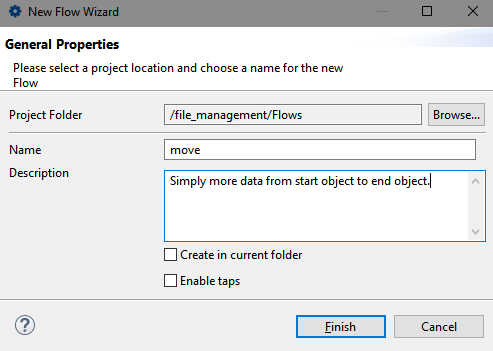
- Enter a flow name (for example, move) with a description (optional), and then click Finish.
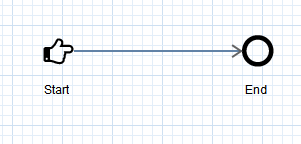
The process flow (move) opens as a new tab in your workspace area where you can start building the application logic for processing data. By default, the process flow consists of a Start and an End object. For this how-to, no data processing will be performed, except for simply moving the file. The process flow will be left as is.
You are now ready to create a channel, which will pick up the input files and execute the process flow you created. The file-based channel defines the source and target of the data.
Configuring a Channel
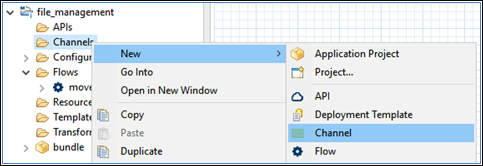
- Right-click the Channels folder, select New from the context menu, and then click Channel, as shown in the following image.
The Channel Object dialog box (Channel General Properties pane) opens, as shown in the following image.
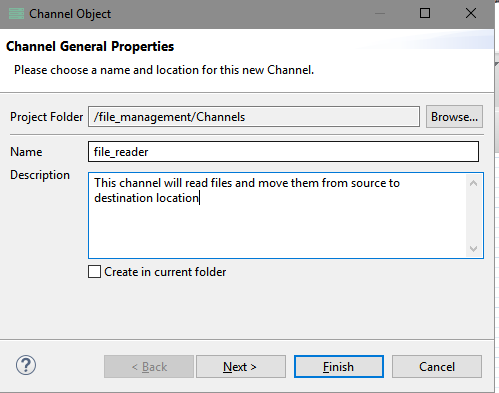
- Provide a name for the channel (for example, file_reader), a description (optional), and then click Finish.
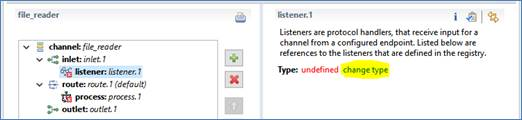
The Channel Builder opens where you can add various channel components. For this how-to, only one File listener will be added and connected to the process flow that you created.
- In the left pane of the Channel Builder, click listener:listener.1, and in the right pane, click the change type link, as shown in the following image.
The Modify listener type dialog box (Listener Component Type pane) opens, as shown in the following image.
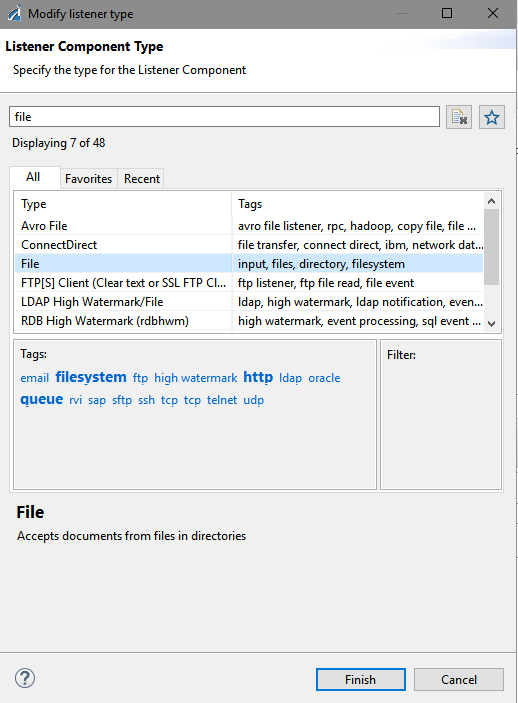
- From the available list of listeners, select File and then click Finish.
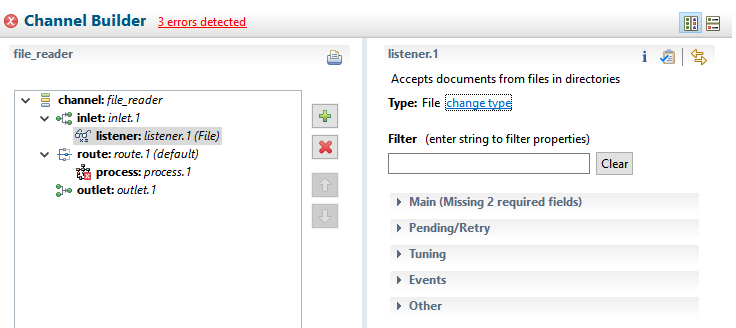
You are returned to the Channel Builder. A File listener is added to your channel. The File listener also features an array of options for advanced users, as shown in the following image.
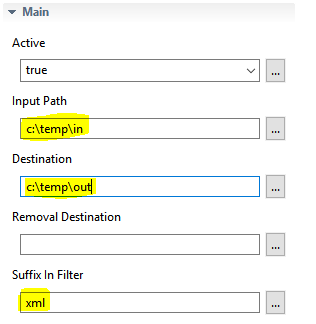
- Expand the Main section and define the parameters, as specified in the following table. Leave the default values for the remaining parameters.
Parameter Value Input Path
C:\temp\in
Destination
C:\temp\out
Suffix In Filter
xml
For example:
Note: In this how-to, the values are being hardcoded. However, in a real application, the parameter values can be an iWay Functional Language (iFL) look up (such as reading a property file), a variable, or a reference to a centralized value.
You can now assign the process flow to the channel.
- In the left pane of the Channel Builder, click process:process.1, and in the right pane, click the plus sign (+) icon to add a process flow, as shown in the following image.
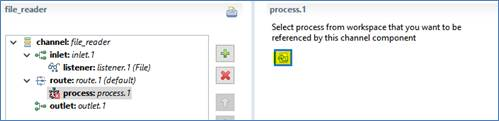
The Resource Selection dialog box opens, as shown in the following image.
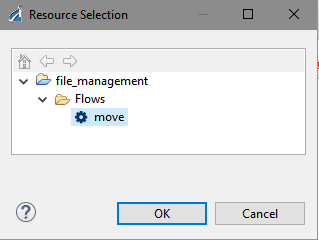
- From the list of available process flows, browse to the process flow you have just created and select move, and then click OK.
You are returned to the Channel Builder.
- Save your project by clicking on the multi-disk icon
 , which saves all the components.
You are now ready to deploy your application.

Deploying the Application
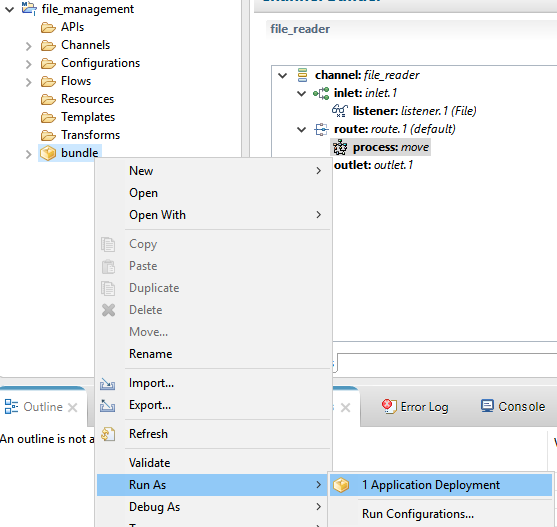
- Right-click on the bundle folder (or the new name you provided this folder), select Run As from the context menu, and then click Application Deployment, as shown in the following image.
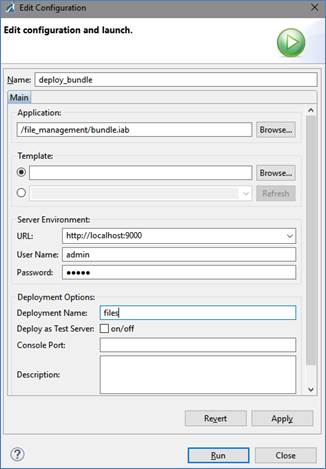
The Edit Configuration dialog box opens, as shown in the following image.
Note: The first time you deploy your application, you will be prompted to enter values for the deployment properties. For any subsequent deployments or redeployments, you will be prompted to reconfirm the replacement of the previous deployment. If you wish to reconfigure the deployment properties, then select Run Configuration.
- In the Server Environment section, provide the URL and credentials for the iWay Service Manager (iSM) instance where your application will be deployed.
- In the Deployment Options section, provide the deployment name for your application, which will be the actual name of the deployed/running application, then provide an optional description.
You also have the Autostart Application option, which you can leave cleared for this deployment instance.
If your application requires a runtime template with server based properties, you can also select the specific template to apply to the deployment.
- Click Apply, and then click Run.
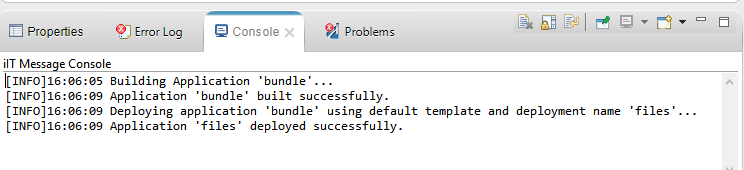
The application is deployed successfully and the Console tab should display messages similar to the ones shown in the following image.
You are now ready to start and test your application.
Starting and Testing the Application
- Open the iSM Administration Console (the default is http://localhost:9999 with admin/admin credentials).
You can also open the iSM Administration Console by clicking the
 icon in iWay Integration Tools (iIT).
- Click the Management link in the upper- right corner, as shown in the following image.
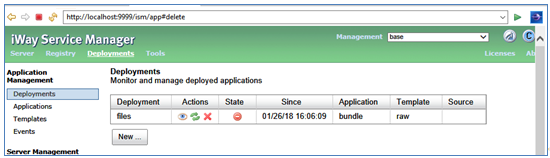
- Click Deployments.
Your application is listed in the Deployments pane, but is not yet started.
- Start your application either from the Windows Services dialog box, a command prompt, or from the iSM Administration Console by clicking on the red minus sign icon in the State column.
When the application has started, the icon in the State column will change to a green check mark, as shown in the following image.

- Copy any XML document and paste it into the following input folder that was defined for the File listener:
c:\temp\in
The file will be picked up by the File listener as it matches the filter of having a .xml extension, and will be processed. The file will be removed from the input directory and placed into the following output folder that was defined for the File listener:
c:\temp\out
The default setting for the File listener is to only parse XML files. Placing a non-XML file with a .xml extension will cause the process to fail.