Extracting and Storing PDF Form Data Into a Repository
Search form
This topic describes how to extract required information from a PDF form document to populate database tables. For example, you may have users submitting PDF forms and an application that must read the provided data and store it in a repository for general accessibility to other consuming applications. It is important to note that after the data in a PDF form has been extracted into XML format, it can be enriched by look ups against additional data sources and then sent to consuming applications other than just a database, which is used here as an example. The database Insert step demonstrates how you can pass dynamic variables as well as configure various connection profiles. This is key functionality when managing databases.
The following sample components should be downloaded for use with this how-to:
- client_management.zip - A completed application project that you can import into iWay Integration Tools (iIT) using the Import Existing Project into Workspace option. After importing, you can browse the components and proceed to deploying the application. For more information, see Deploying the Application.
- demo_form.pdf - A sample PDF form that is used to extract data. You can change the data within the form, but must save it as a PDF document. To use your own PDF form with a different structure, the process flow would first need to be modified to fit the structure of any customized PDF form document.
________________________________________________________
Click here to download a PDF version of this How-to.
________________________________________________________
This how-to includes the following topics:
- Prerequisites
- Summary of Steps and Key Features
- Database Table Script for MS SQL Server
- Creating an Application Project
- Configuring a Process Flow
- Configuring a Channel
- Deploying the Application
- Starting and Testing the Application
Prerequisites
Before continuing, ensure that the following prerequisites are confirmed.
- Database. For this how-to, a Microsoft SQL (MS SQL) Server database is configured with a single table. The definition of the table is provided as part of this tutorial. For more information, see Database Table Script for MS SQL Server.
You can use any database of your choice, but must adjust the table script to match your database requirements. You must also copy the specific JDBC database drivers into the following directory:
<iway_home>\lib
- Folders. The following input and output folders are predefined for the File listener:
- C:\temp\in
- C:\temp\out
Ensure that these folders are created before proceeding with this how-to. However, you may also define other paths for the input and output folders when configuring the File listener.
Summary of Steps and Key Features
This how-to consists of the following steps:
- Creating an application project.
- Creating a process flow to:
- Convert the PDF form document into XML format.
- Perform an Insert operation into a database table using the fields from the converted PDF form document.
- Creating a channel to:
- Read PDF form documents.
- Call the process flow to process form documents.
The following key features are demonstrated by this how-to:
- PDF Component
- JDBC Component
- Dynamic SQL
- XPATH functionality
- Reusable Generics (Connection Profile)
- Channel Builder
- File listener
Database Table Script for MS SQL Server
Use the following script to create a database table in MS SQL Server that is referenced by this how-to.
CREATE TABLE [dbo].[person](
   [first_name] [varchar](50) NULL,
   [last_name] [varchar](50) NULL,
   [adr_1] [varchar](50) NULL,
   [adr_2] [varchar](50) NULL,
   [house_nr] [varchar](50) NULL,
   [zip] [varchar](20) NULL,
   [country] [varchar](30) NULL,
   [gender] [varchar](20) NULL,
   [height] [varchar](20) NULL,
   [driver_license] [varchar](10) NULL,
   [ln_Deutsch] [varchar](10) NULL,
   [ln_English] [varchar](10) NULL,
   [ln_Franch] [varchar](10) NULL,
   [ln_Spanish] [varchar](10) NULL,
   [ln_Latin] [varchar](10) NULL,
   [colour] [varchar](20) NULL
) ON [PRIMARY]
GO
Creating an Application Project
- Open iWay Integration Tools (iIT) and select the default workspace.
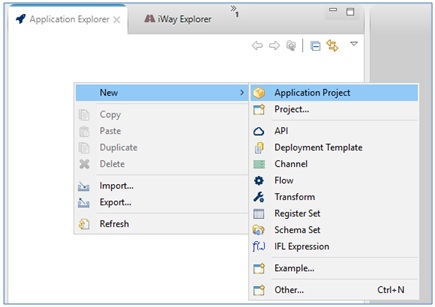
- Right-click anywhere within the Application Explorer tab, select New from the context menu, and then click Application Project, as shown in the following image.
The New Application Project dialog box opens, as shown in the following image.
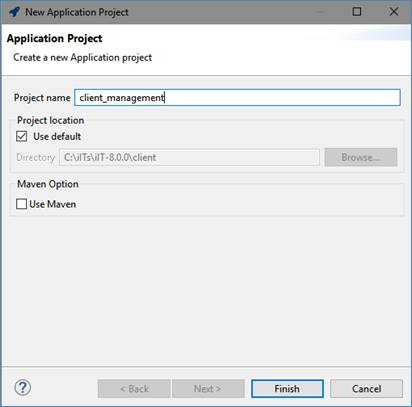
- Provide a project name (for example, client_management) and then click Finish.
A new application is created, containing the required project folder structure, as shown in the following image.
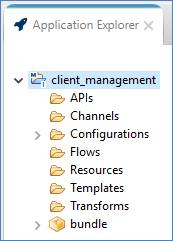
The bundle folder is the application package name, which you can rename if required. During deployment, you will be prompted to select the name of the deployed application.
You are now ready to configure your process flow.

Configuring a Process Flow
Now you are going to insert the read information into the database table.
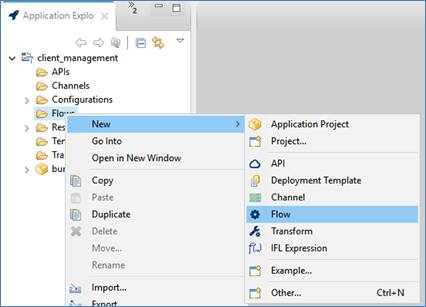
- Right-click the Flows folder, select New from the context menu, and then click Flow, as shown in the following image.
The New Flow Wizard dialog box opens, as shown in the following image.
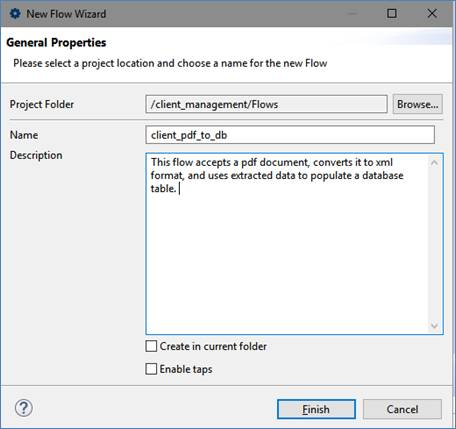
- Provide a name for the process flow (for example, client_pdf_to_db), a description (optional), and then click Finish.
The process flow (client_pdf_to_db) opens as a new tab in your workspace area and includes a Start and an End object, as shown in the following image.
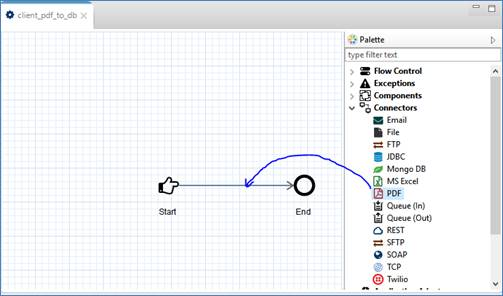
- From Palette in the right pane, expand the Connectors group, and click and drag the PDF object. Drag the PDF object directly onto the line between the Start and End objects, or place it anywhere on the canvas and then recreate the relationship.
To add an object directly on the line, simply start dragging the object over the solid line. When the dotted lines appear as shown in the following image, release the object.

The object is added to the process flow and its configuration properties are presented.
- To access the configuration properties for any object used in a process flow, click the object in the process flow, and then click the Properties tab, as shown in the following image.
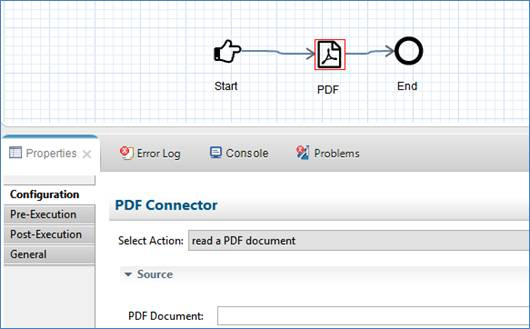
The PDF object reads PDF files and converts them into XML format. In the PDF Document field, you can provide the source of the document (for example, a specific location of a PDF to read as input) or leave this field empty and the processing will apply to all PDF files that are passed to this process flow.
- Leave the PDF Document field empty, since you will be reading documents using the File listener, which can handle many PDF files as they arrive.
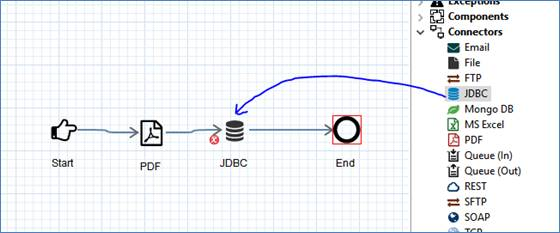
- From the Connectors group, click and drag the JDBC object, as shown in the following image.
The properties for the JDBC object are displayed in the Properties tab, as shown in the following image.
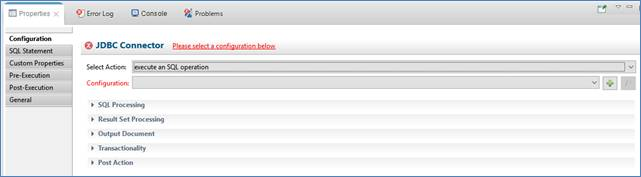
- Click the plus (+) sign to the right of the Configuration field.
This field enables the creation of a new connection profile to a database. If a connection was already defined, you can reuse it by selecting it from the drop-down list.
If you are creating a new connection profile, then the New Generic dialog box (Select Type pane) opens, as shown in the following image.
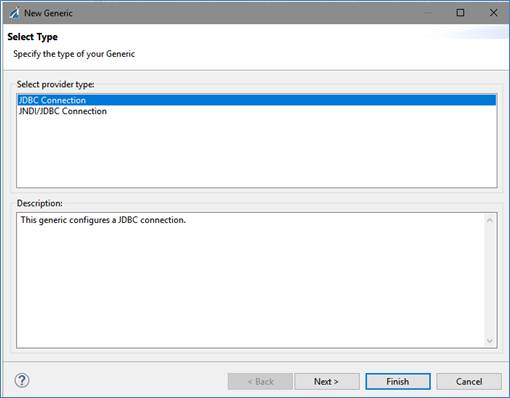
- Select JDBC Connection and then click Next.
The Configuration properties for jdbc.1 pane opens, as shown in the following image.
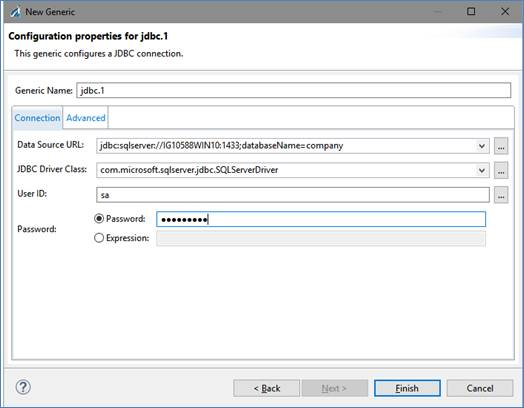
- Provide the required connection information for the database you are using and then click Finish.
- You are returned to the main Properties tab (Configuration section) of the JDBC object.
- Click the SQL Statement tab to provide an SQL statement to execute.
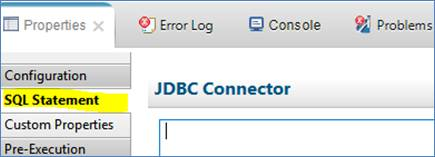
You will use dynamic SQL, which will accept values from the incoming XML formatted document and use them as input values for the Insert statement.
- Type the following SQL statement, note that the question mark (?) character indicates that the variable should be replaced with the value defined. You will be inserting only two values from the incoming PDF form document
insert into person (first_name,last_name) values ('?first','?last')Note: Single quote characters (' ') are used to indicate it is a string for the Insert operation.
Now you can map the incoming PDF form fields into the Insert statement variables. You are not required to insert all of the fields and such limit the mappings. However, you will insert all the fields from the PDF form document for this how-to.
- Click the Custom Properties tab.
- To add new variable definitions for mapping, click the plus (+) sign icon, as shown in the following image.
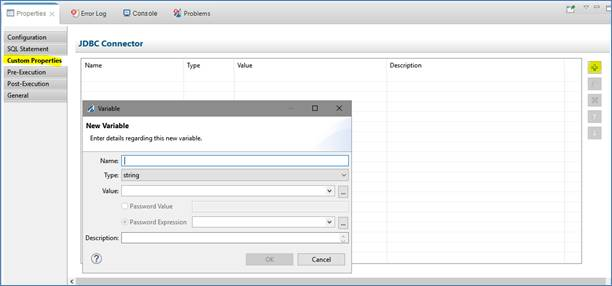
- Create two variable definitions for mapping, as specified in the following table.
Name Type Value first
string
_XPATH(//field[@name='Given Name Text Box'])
last
string
_XPATH(//field[@name=Family Name Text Box'])
For example:
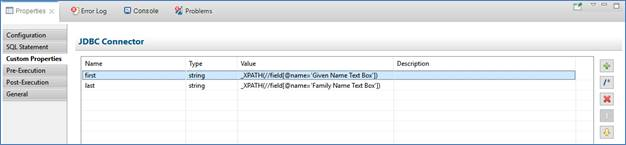
Your final process flow should be structured, as shown in the following image.

Note: Error handling logic has not been implemented in this process flow, which is not part of this how-to.
You are now ready to create a channel, which will pick up the PDF files and execute the process flow you just created.
Configuring a Channel
- Right-click the Channels folder, select New from the context menu, and then click Channel, as shown in the following image.
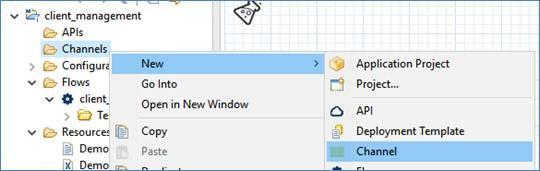
The Channel Object dialog box (Channel General Properties pane) opens, as shown in the following image.
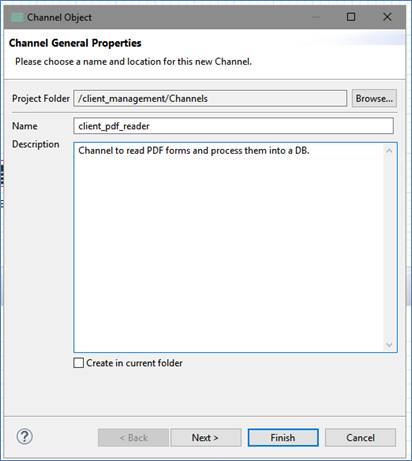
- Provide a name for the channel (for example, client_pdf_reader), a description (optional), and then click Finish.
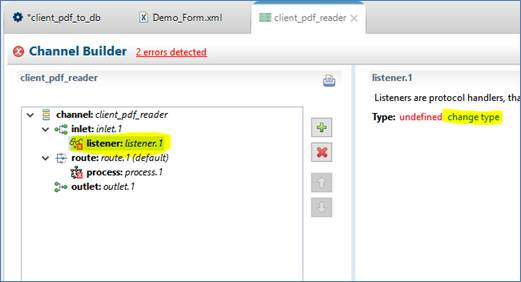
The Channel Builder opens where you can add various channel components. For this how-to, you will be adding only one File listener and point your channel to the process flow that you created.
- In the left pane of the Channel Builder, click listener:listener.1, and in the right pane, click the change type link, as shown in the following image.
The Modify listener type dialog box (Listener Component Type pane) opens, as shown in the following image.
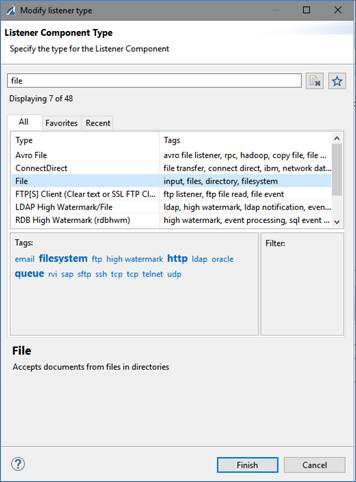
- From the available list of listeners, select File.
You can type in the name to filter out some of the supported protocols. As file-based protocols can be handled through different input sources, you will have multiple choices.
- Click Finish.
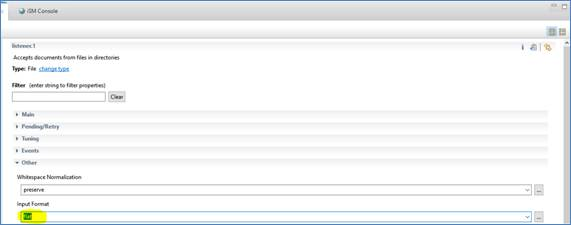
You are returned to the Channel Builder. A File listener is added to your channel. The File listener also features an array of options for advanced users.
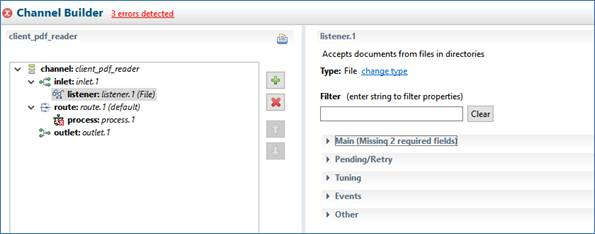
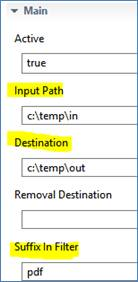
- Expand the Main section and define the parameters, as specified in the following table. Leave the default values for the remaining parameters.
Parameter Value Input Path
C:\temp\in
Destination
C:\temp\out
Suffix In Filter
pdf
For example:
- Expand the Other section, and select flat from the Input Format drop-down list.
You can now assign the process flow to the channel.
- In the left pane of the Channel Builder, click process:process.1, and in the right pane, click the plus sign (+) icon to add a process flow, as shown in the following image.
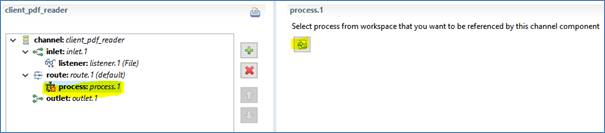
The Resource Selection dialog box opens, as shown in the following image.
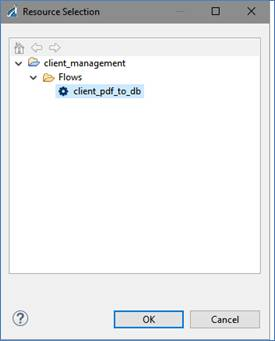
- Browse to the process flow you have just created, select client_pdf_to_db, and then click OK.
You are returned to the Channel Builder.
- Save your work by clicking on the multi-disk icon
 which saves all the components. You are now ready to deploy your application.
Deploying the Application
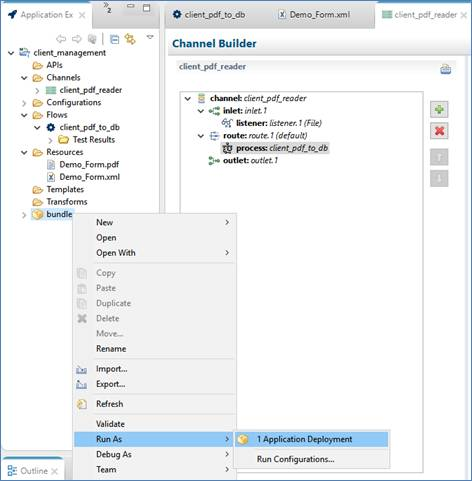
- Right-click the bundle folder (or the new name you provided for this folder), select Run As from the context menu, and then click Application Deployment, as shown in the following image.
The Edit Configuration dialog box opens, as shown in the following image.
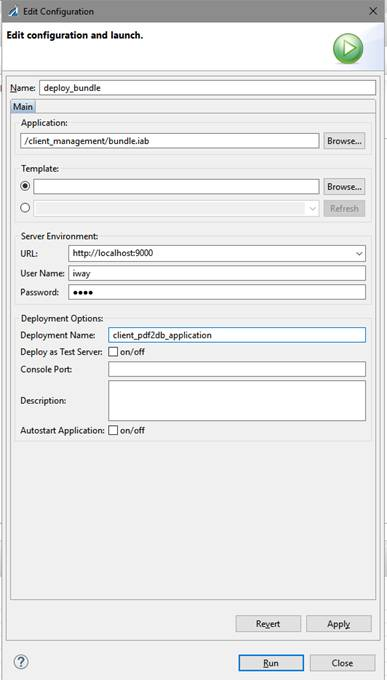
Note: The first time you deploy your application, you are prompted to provide values for the deployment properties. For any subsequent deployments or redeployments, you are prompted to reconfirm the replacement of the previous deployment. If you wish to reconfigure the deployment properties, then select Run Configurations.
- In the Server Environment section, provide the URL and credentials for the iWay Service Manager (iSM) instance where your application will be deployed.
- In the Deployment Options section, provide the deployment name for your application, which will be the actual name of the deployed/running application, then provide an optional description.
You also have the Autostart Application option, which you can leave unchecked for this deployment instance.
If your application required a runtime template with server-based properties, you can also select the specific template to apply to the deployment. You will not be specifying a template for this deployment instance.
- Click Apply and then click Run.
The application is deployed successfully and the Console tab should display messages similar to the ones shown in the following image.

You are now ready to start and test your application.
Starting and Testing the Application
- Open the iSM Administration Console (the default is http://localhost:9999 with admin/admin credentials).
You can also open the iSM Administration Console by clicking the
 icon in iIT.
 - Click the Management link in the upper-right corner, as shown in the following image.
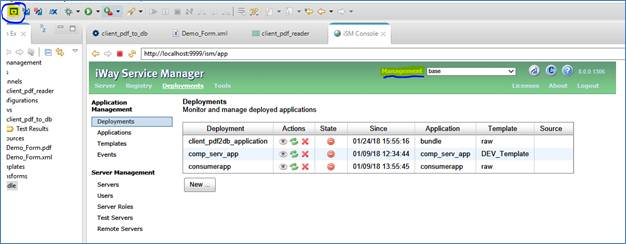
- Click Deployments.
Your application is listed in the Deployments pane, but is not yet started.
- Start your application either from the Windows Services dialog box, a command prompt, or from the iSM Administration Console by clicking on the red minus icon in the State column.
Once the deployed application has started, the icon in the State column will change to a green check mark, as shown in the following image.

- Copy the sample demo_form.pdf file that is provided with this how-to and paste it into the following input folder that was defined for the File listener:
c:\temp\in
The demo_form.pdf file will be picked up by the File listener and processed. You can check the response in the following output folder that was defined for the File listener:
c:\temp\out
The successful response will contain the result of the SQL Insert status code. You can also go into your database table and check that the information has been inserted.
Sample output:
<?xml version="1.0" encoding="UTF-8" ?>
   <iway>
      <response service="agent_JDBC" totalrows="0" totalupdate="1">
         <cncresult>
            <result format="field"/>
         </cncresult>
         <timestamp>2018-01-24T21:15:46Z</timestamp>
         <execstatus>0</execstatus>
      </response>
   </iway>