Installing and Configuring Apache ActiveMQ With iWay Service Manager Version 8
Search form
This topic describes how to install and configure Apache ActiveMQ with iWay Service Manager (iSM) version 8.
________________________________________________________
Click here to download a PDF version of this How-to.
________________________________________________________
This how-to includes the following topics:
- Prerequisites
- Installing iWay Service Manager
- Installing Apache ActiveMQ
- Configuring a Queue Using Apache ActiveMQ
- Configuring iWay Service Manager Components
- Configuring a Topic
- Testing the Channel
- Troubleshooting
Prerequisites
Before continuing, ensure that you have the following components and settings available on your system:
- Apache ActiveMQ version 5.15.x, which you can download from the following website:
http://activemq.apache.org/
- iWay Service Manager (iSM) version 8.0 or higher.
- Java Development Kit (JDK) version 1.8 or higher.
- Set the JAVA_HOME and ACTIVEMQ_HOME environment variables as follows:
-
JAVA_HOME = C:\Java\jdk1.8.0_xx
-
ACTIVEMQ_HOME = C:\env\apache-activemq-5.15.3
-
Installing iWay Service Manager
Before continuing, iWay Service Manager (iSM) version 8.0 or higher must already be installed with support for Apache ActiveMQ. For more information on installing iSM, see the iWay Installation and Configuration Guide.
Installing Apache ActiveMQ
To install Apache ActiveMQ on your system:
-
Extract the Apache ActiveMQ files to a directory on your system. For example:
C:\env\apache_activemq-5.15.3
-
Copy the activemq-all-5.xx-.jar file from C:\env\apache_activemq-5.15.3 and paste this file into the iWay classpath (iway_home\lib) directory. For example:
C:\iway8\lib
-
Open a command prompt window, navigate to the activemq_home\bin directory and type the activemq start command. For example:
C:\env\apache-activemq-5.15.3\bin>activemq start
-
Press Enter.
You should see a startup sequence that is similar to the following:
INFOO | Apache ActiveMQ 5.13-SNAPSHOT (localhost, ID:INFORMA-PNUJOK8-57364-14399
17421865-0:1) started
INFO | For help or more information please see: http://activemq.apache.org
INFO | ActiveMQ WebConsole available at http://0.0.0.0:8161/
Note: You may see other log information surrounding these lines, which is normal.
Configuring a Queue Using Apache ActiveMQ
To configure a queue using Apache ActiveMQ:
-
Navigate to the Apache ActiveMQ web console by entering the following URL in your browser:
http://localhost:8161
- Select Manage ActiveMQ broker.
If you are prompted, enter the following user credentials:
- User name: admin
- Password: admin
- Click Queues in the menu bar, as shown in the following image.
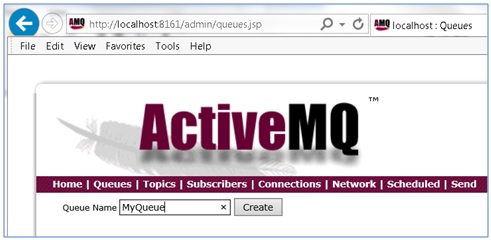
- In the Queue Name field, type MyQueue and then click Create.
- Repeat the previous step to create the following additional queues:
- replyto
- pend
- out

Configuring iWay Service Manager Components
To configure the required iWay Service Manager (iSM) components:
-
Navigate to the iSM Administration Console by entering the following URL in your browser:
http://localhost:9999
- Create a new Java Message Service (jmsq) listener and specify the following values for the configuration parameters:
- Name: ActiveMQ_listener
- Connection: connectionFactory
- JNDI Factory: org.apache.activemq.jndi.ActiveMQInitialContextFactory
- JNDI URL: tcp://localhost:61616
- Receiver Name: MyQueue
- Default Reply: replyto
- Userid: admin
- Password: admin
- JMSReply To: out
- Pending Queue: pend
- Input Format: json (or as appropriate)
Note: Leave default values for all of the remaining parameters.
- Create a new File emitter, as shown in the following image.
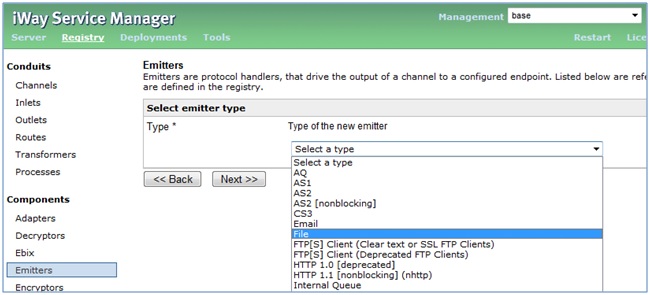
- Click Next to continue.
-
Type the following path in the Destination field:
c:\tmp\ActiveMQ_*.txt
- Click Next.
- Type ActiveMQ_emitter_file in the Name field.
- Click Finish.
- Create a new channel called ActiveMQ_channel and associate the following components (artifacts):
- Add ActiveMQ_listener to ActiveMQ_inlet.
- Add the Move route to ActiveMQ_route (ignore if you are already using the Move route).
- Add ActiveMQ_emitter_file to ActiveMQ_outlet.
- Build the channel (ActiveMQ_channel).
-
Use the jndi.properties file shown below:
# START SNIPPET: jndi
java.naming.factory.initial = org.apache.activemq.jndi.ActiveMQInitialContextFactory
# use the following property to configure the default connector
java.naming.provider.url = tcp://localhost:61616
# use the following property to specify the JNDI name the connection factory
# should appear as.
connectionFactoryNames = QueueCF, connectionFactory, queueConnectionFactory, topicConnectionFactry
# register some queues in JNDI using the form
# queue.[jndiName] = [physicalName]
queue.MyQueue = MyQueue
queue.reply = reply
queue.out = out
queue.pend = pend
queue.in = in
# register some topics in JNDI using the form
# topic.[jndiName] = [physicalName]
topic.MyTopic = ActiveMQ.Advisory.Consumer.Queue.in
# END SNIPPET: jndi
-
The jndi.properties file must exist in the iWay Integration Application (iIA) working directory. For the BASE configuration in iSM, the jndi.properties file should be located in the following directory:
iway_home\config\base
- If the file is not available in this location, you will receive a Java error indicating name not found during channel start up.
-
- Restart iSM.
- Deploy and start the channel (ActiveMQ_channel).

Configuring a Topic
To configure a topic:
-
Edit the following line in your jndi.properties file to match your ActiveMQ topic name:
topic.MyTopic = ActiveMQ.Advisory.Consumer.Queue.in
The topic name must be the same name that you are using in the channel.
- Specify the following values for your channel, under MAIN:
- Connection Factory: topicConnectionFactory
- Receiver Name: (Use the topic name found in the jndi.properties file)
- Message Type: topic
- Specify the following value for your channel, under OTHER:
- Input Format: json
- Input Format: json
- Click Save to save your changes.
- Click Run As and then select Application Deployment.
- Restart iSM.
Testing the Channel
To test your channel (ActiveMQ_channel) that you configured, you must PUT a message on the Receiver queue.
- Navigate to the Apache ActiveMQ web console by entering the following URL in your browser:
http://localhost:8161
- Click Send in the menu bar.
The Send a JMS Message page opens, as shown in the following image.
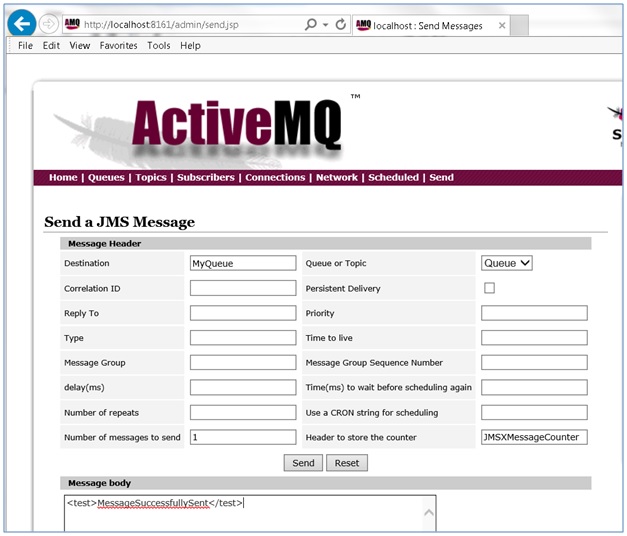
- In the Destination field, type MyQueue.
- In the Message body area, enter the following:
<test>MessageSuccessfullySent</test>
- Click Send.
You will now have one message in the queue that is named MyQueue.
-
Start the channel (ActiveMQ_channel) that you previously configured.
The message is consumed and placed in the following directory:
c:\tmp

Troubleshooting
If you encounter a name not found context issue, perform the following steps:
- Confirm that the jndi.properties file exists in the iWay Integration Application (iIA) working directory.
Note: If you delete your iIA, then the jndi.properties file is also deleted.
- If you are using a topic, then this topic must be specified in your channel and the jndi.properties file.
- If a subscriber is not shown, then you must check for the wrong IP and/or user ID and password.
- If the message contains many XML escape entities (for example, & space placeholders), then you are configured for XML, but actually want to be using JSON.